PREPARING THE CLAY
1) Correct Conditioning:
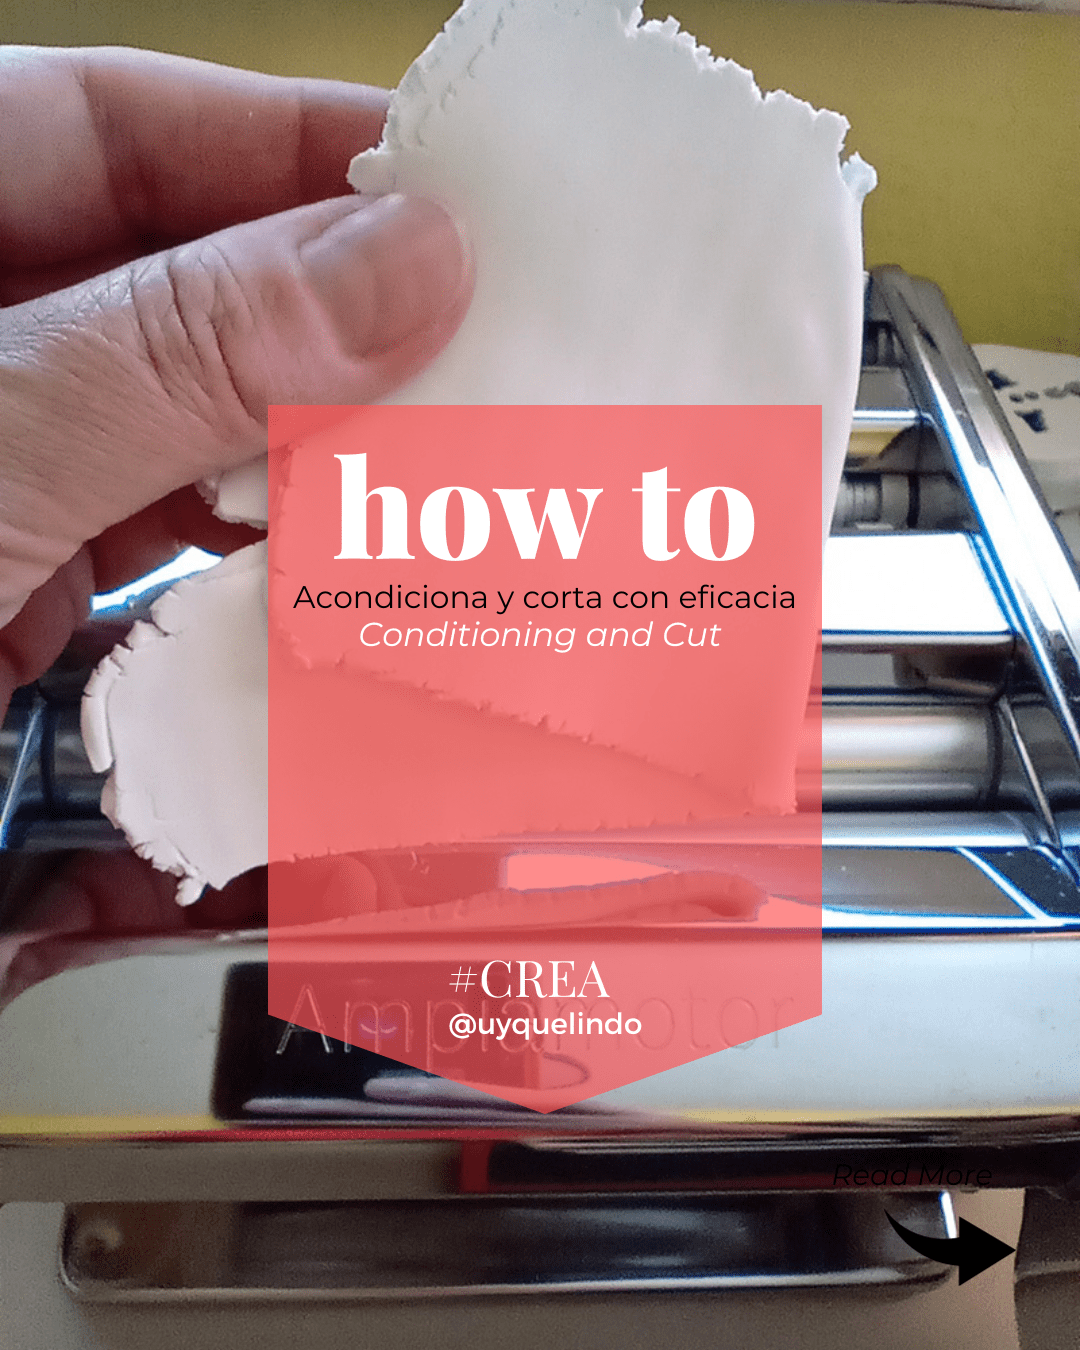
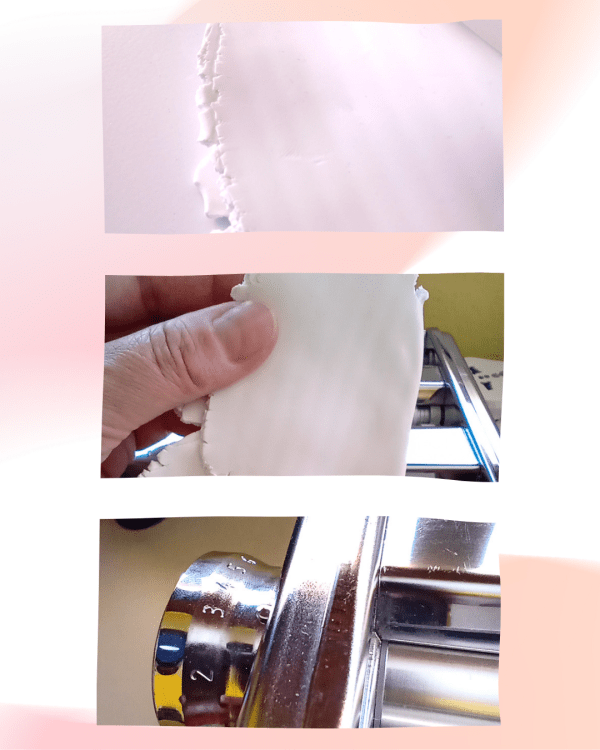
Conditioning the clay is the first important step. What does this mean? Basically, it is the process of stretching, bending and re-stretching the clay several times until the edges do not crack or crack to a minimum (see reference photo). This ensures that the clay has adequate flexibility for cutting.
2) Extend with care:
Always position the fold of the clay to one side before re-stretching it. This trick helps to eliminate trapped air both above and below the clay, preventing the formation of unwanted bubbles. If, despite your best efforts, bubbles appear, gently stretch the dough where you see them using your fingers, then fold and stretch again until you reach the desired thickness. You can also prick the bubbles to release trapped air before stretching again.
3) Let it rest:
After opening a package of clay and conditioning it, it is common for the clay to become too soft. This can cause your pieces to warp, mark excessively or stick to your tools during the cutting process. To avoid this, let the dough rest. Stretch it between two sheets of white office paper and let it rest for a period that can sometimes vary from one day to the next. You can then store this stretched and rested dough by folding it and placing it in a zip-lock bag to prevent it from drying out.
Remember that a dough that has not been properly conditioned will lack the necessary elasticity and may crack after firing. On the other hand, a dough that has not rested may hinder the cutting process as it adheres excessively to the materials due to its high solvent content.

USE A SMOOTH BAKING SURFACE
4) Stretch the dough to a thickness of 3 to 4 mm:
After conditioning the dough, stretch it to achieve a thickness of 3 to 4 mm. If you are using a pasta machine, this generally corresponds to gear settings 1 or 2, with 1 being the thickest setting and 2 being a little thinner.
5) Place the Dough Sheet on a Clean and Smooth Tile:
Carefully lay out the stretched sheet of dough on a clean, smooth tile. Do this gradually, avoiding stretching the dough with your hands and making sure there are no bubbles of air trapped under the dough, as this could create bubbles that would translate into slabs on your pieces once fired.
6) Use white paper and a rolling pin or flat material:
Place a piece of white paper over the dough and gently roll a rolling pin or flat object over the paper. This is done with the intention that the paper will adhere evenly to the entire surface of the dough. In addition to eliminating fingerprints and uneven marks that might be left from using the pasta machine or rolling pin, this step provides a matte, even finish to the surface, even before baking.
With the above preparation complete, you are ready to begin cutting your pieces. The tile will serve as a stable work surface and will prevent the pieces from shifting during cutting. You can cut your pieces and lay them directly on the tile, which will make it easier to transport the pieces to the oven without altering their shape.
Ready to cut!
Corn Starch and other substances as Anti-Abrasives:
Corn starch plays an important role as an anti-abrasive agent by reducing friction between the clay and any surface with which it is in contact. This makes it easier for tools, whether molds, cutters, spatulas, or other tools, to slide easily. To apply the cornstarch, use a soft brush and apply a minimal amount. Start by lightly sprinkling the starch on the rolled out dough and then on the edges of the tool. It is not necessary to use a large amount, as removing the excess later may take time. The cornstarch will help your tools glide smoothly and allow you to work more accurately.
Like starch, a fine spray of water, soapy water or water with one part liquid silicone (the one used to revive furniture upholstery) also works perfectly. Wetting the edges of your tools in a sponge soaked in these substances is another way.


Optimizing your Baking Process
When you need to bake multiple pieces at the same time, follow this simple process. After cutting the pieces, allow them to rest briefly, protecting them from environmental dust and dirt. Then, using a blade, remove them from the tile by applying a diagonal motion with gentle pressure toward the tile. You will be surprised how easily they come off. Now, you can arrange them on another tile, on parchment paper, to achieve a uniform matte finish on all your creations.
By following these tips, you will not only get exceptional results, but you will also optimize your production process by systematizing pre- and post-cutting tasks. Start applying these tricks and watch your creations improve!
Three-step cutting technique without release agents:
An effective cutting technique without the need for release agents involves dividing the process into three progressive steps:
- Step A: Start by positioning the tool and slightly plunging it into the clay. Then, move it gently to peel it off without removing it completely.
- Step B: In the next step, reposition the tool and press to stamp. Use a roller or flat tool to evenly distribute the pressure. This will ensure that you get sharpness throughout the image. Without reaching the bottom yet, make gentle movements to peel off the tool.
- Step C: Finally, reposition the tool and apply final pressure to complete the cut. With this technique, you can obtain precise cuts without the need for release agents, which makes your work easier and faster.